Create and Use Custom Libraries
See Use the Custom Library for more information.
-
-
There is a difference between Libraries usage and the Import / Export commands related to PLC
 "Programmable Logic Controller"
A Programmable Logic Controller, PLC, or Programmable Controller is a digital computer used for automation of industrial processes, such as control of machinery on factory assembly lines.
Used to synchronize the flow of inputs from (physical) sensors and events with the flow of outputs to actuators and events programs.
"Programmable Logic Controller"
A Programmable Logic Controller, PLC, or Programmable Controller is a digital computer used for automation of industrial processes, such as control of machinery on factory assembly lines.
Used to synchronize the flow of inputs from (physical) sensors and events with the flow of outputs to actuators and events programs.- Library is a unique source that can be shared between different projects (like a dll in C): when you modify the library, all the linked projects are impacted.
- Import/Export is equivalent to a copy and paste operation of programs: when you update the source of your UDFB
 "User Defined Function Block"
UDFB can be used as a sub-function block in another program of the application. It is described using FBD, LD, ST or IL language. Input / output parameters of a UDFB (as well as private variables) are declared in the variable editor as local variables of the UDFB, the other programs are not updated because the code has been duplicated.
Create the Custom Library
- In the File menu, click the New command (save your current opened project if necessary).
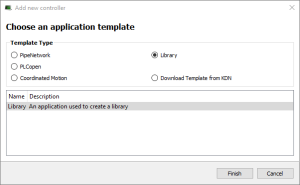
- Select the Library application template.
- Click the Finish button.
- In the File menu, click the Save As command.
- Define the Library Name (extension *.kal) and its Location.
- Click OK.
- In the Project Explorer, expand the Controller and PLC nodes.
- Right-click on Subprograms and choose New UDFB in the contextual menu.
- Select the type of programming language.
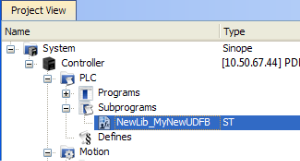
- Expand the Subprograms node and rename the new UDFB.
-
-
The name of the variable type is displayed in the dictionary if you use this library in another project.
-
-
Duplicate UDFB names in a library are not possible.
Only the first instance found is kept when importing the library definitions in a project.
To avoid this situation when designing your libraries, use a prefix to identify the library for all UDFBs and functions in the libraries (e.g., in the this procedure, the prefix is: NewLib_).
- Create the UDFB program.
See Programs: Structure and Syntax for more information. - In the File menu, click the Save command.
Figure 4-32: Create a Custom Library - Select the Library Template
Use the Custom Library
- Open the project where you want to use a library.
- In the Project Explorer, expand the Controller node.
- Right-click PLC and select Libraries in the menu.
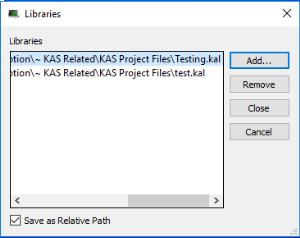
- Click Add.
You can add as many external libraries as you want.
- Select a previously created *.kal file and click Open.
-
-
You can use the relative path to specify the path relative to the working directory where your project is saved.
This ensures consistency when you move your project and your library.
Conversely, the absolute path points to the same location on your file system regardless of your project directory.
- Click Close.
The library is displayed in the Library widget and you can now drag-and-drop the UDFB (or any subprogram) of this library in any editor.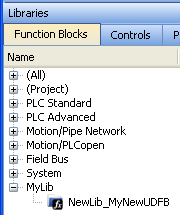
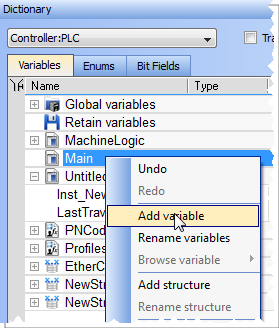
- In the Dictionary toolbox, right-click the program and select Add variable.
- In the Type drop-down menu, select the type defined in the external library (it can be at the bottom of the list).
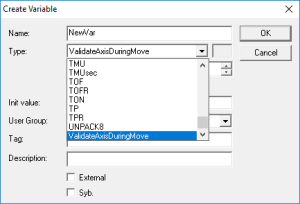
Figure 4-33: Use a Custom Library - Select the Library
Figure 4-34: Use a Custom Library - Display the Library
Figure 4-35: Use a Custom Library - Add variable
What happens when you remove a library from your project?
If you remove a library from your project, all its types are removed from your project and all variables based on the library are displayed in the dictionary in red with question marks.

What happens when a library no longer exists?
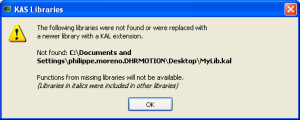
If you open a project containing a link on a library which is no longer available, a warning is displayed:
To recover the libraries, you have two options:
- Enter the new path to this library (assuming it still exists on your machine) using the library dialog (see Use the Custom Library).
- Find the missing library and copy the library back to the path originally specified.
Note that the project has to be closed and re-opened for the library to be read again.
If a library references another library which is no longer available, a dialog with the library link that causes the problem is displayed in italics.
Example: If your project has referenced LIB-4, which in turn references LIB-1-ND, but LIB-1-ND does not exist.
To recover your project, open LIB-4 and fix the issue (i.e., LIB-1-ND broken link), then re-open this project again.
